
Lost ABS experiment with 3D-printed objects and aluminum casting
All throughout this semester I’ve been learning about mold-making and casting at through my university’s sculpture and glassblowing studio and have been working on ways to integrate 3D printing with our new Makerbot Replicator in some way. So far I have had good success with directly printing two-part and open-face molds generated in OpenSCAD, but there is still one possibility that I’ve been really curious about. Using the old tried-and-true method of “lost wax” (a.k.a. investment casting), one can create highly-detailed copies of objects using metals like bronze and aluminum. Usually wax or organic material is used for this process, but what about 3D-printed plastic?
This project was referenced in Bridgette Mongeon’s book “3D Technology in Fine Art and Craft: Exploring 3D Printing, Scanning, Sculpting and Milling” (ISBN 978-1138844339, pg 282)!
Overview of the investment casting process
In investment casting (the modern name of the ancient “lost wax” casting method), objects are suspended inside of a block of special plaster mix (called investment) and literally burned away using a kiln, leaving a hole in the middle of the plaster block. Molten metal (we use aluminum and bronze) is poured into this cavity through a series of veins and arteries called the gating system. When the metal has cooled down, the plaster is broken apart so the metal piece can be retrieved and cleaned up.
The most common material that is invested in these plaster molds is wax (hence “lost wax”), but part of the fun of art is in experimenting with traditional processes to see what works and what doesn’t. In an earlier piece, I created an open-face plaster mold from some 3D-printed gears and made wax copies that could be put together to form a cube. But what if we could skip the mold-making and wax casting step completely and invest the original ABS plastic forms directly?
Theory of “lost ABS” process
For a material to work with the investment casting technique, it needs to be able to burn away or melt out during the long burnout process in the kiln. Wax isn’t the only thing that melts and burns, it just does so at a relatively low temperature and with little to no toxic smoke. Organic materials have been burned out at my campus’s sculpture studio before, so I think it’s been proven that other materials may work as well.
Our 3D printer produces objects using ABS plastic, so if ABS burns out well on its own, it may be good to use for investment casting. Other 3D printing enthusiasts have had greatsuccess with using a different kind of plastic called PLA, but I don’t have any PLA and I don’t want to do too much hacking until I know I need to. If this works, it’ll be a good project to integrate into undergraduate curriculum, so the less special tweaking they have to do the better.
Because ABS is a thermoplastic, it doesn’t have a sharp transition between solid to liquid phases. Instead, it undergoes a glass transition; it gets softer and more rubber-like until eventually melting and then igniting. According to RepRap user nophead, “ABS softens at 90C, melts at 105C, can be extruded at ~180C but needs to be ~240C to bond strongly to itself.”
The MSDS datasheet for Makerbot’s ABS states that it has a flash point of 404C and an auto-ignition temperature of 466C. At this point, there are still two questions in my mind:
- What happens between 240C and 404C?
- What will actually happen at or above 466C?
From what I understand about the material properties of ABS, the plastic will become more and more fluid between 240C and 404C until catching fire. Above 466C it will burn, possibly releasing toxic black smoke. Many hobbyists have a hard time with the black smoke, but because this experiment was done using a big, ventilated kiln I was pretty confident that it’d be OK.
Many 3D-printing hobbyists use PLA for investment casting because it does not produce black smoke. However, the UNK sculpture studio has a nice big kiln with external ventilation, so it may be able to cope with ABS much better. Still, I was pretty nervous about what the ABS would do during the burnout process!
Preparing for investment – printing, gating and flasking
Earlier in the semester I 3D printed a two-part mold that I thought would be interesting to cast in metal. Perhaps it would allow me to create castings with hotter materials (like caramel) or colder materials (like ice).
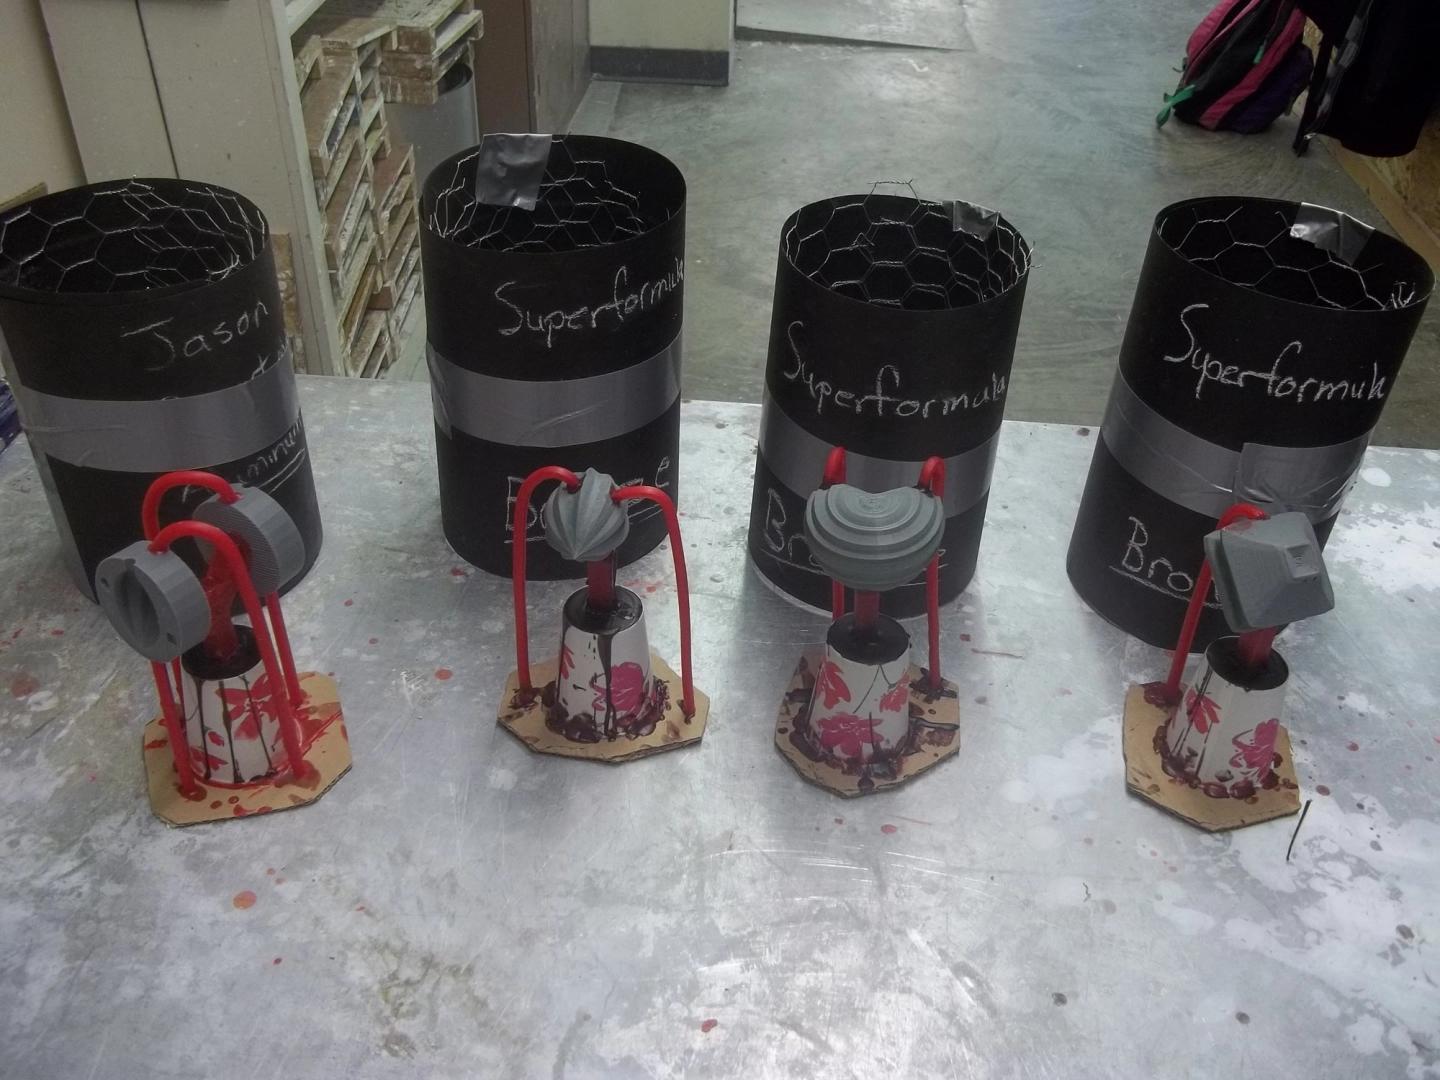
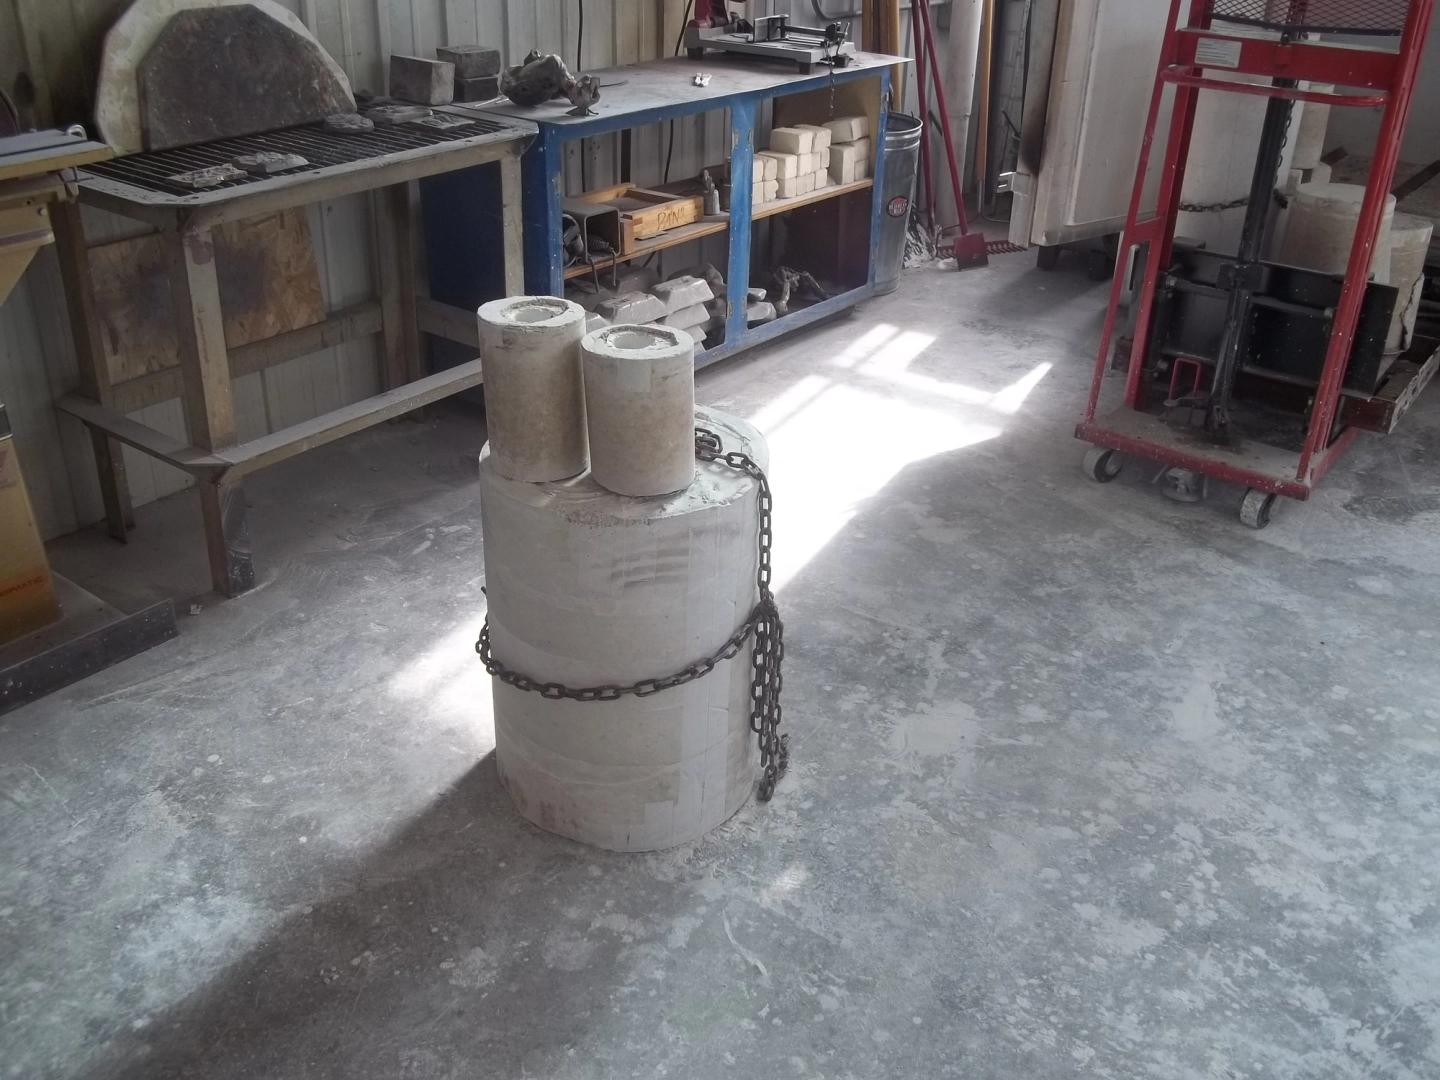
Before pouring any plaster / investment, the pieces need to be gated so that we have a way to actually get molten metal into the mold later on. We use small paper cups, cardboard and wax to create a sort of plumbing system around the pieces for the metal to flow through.
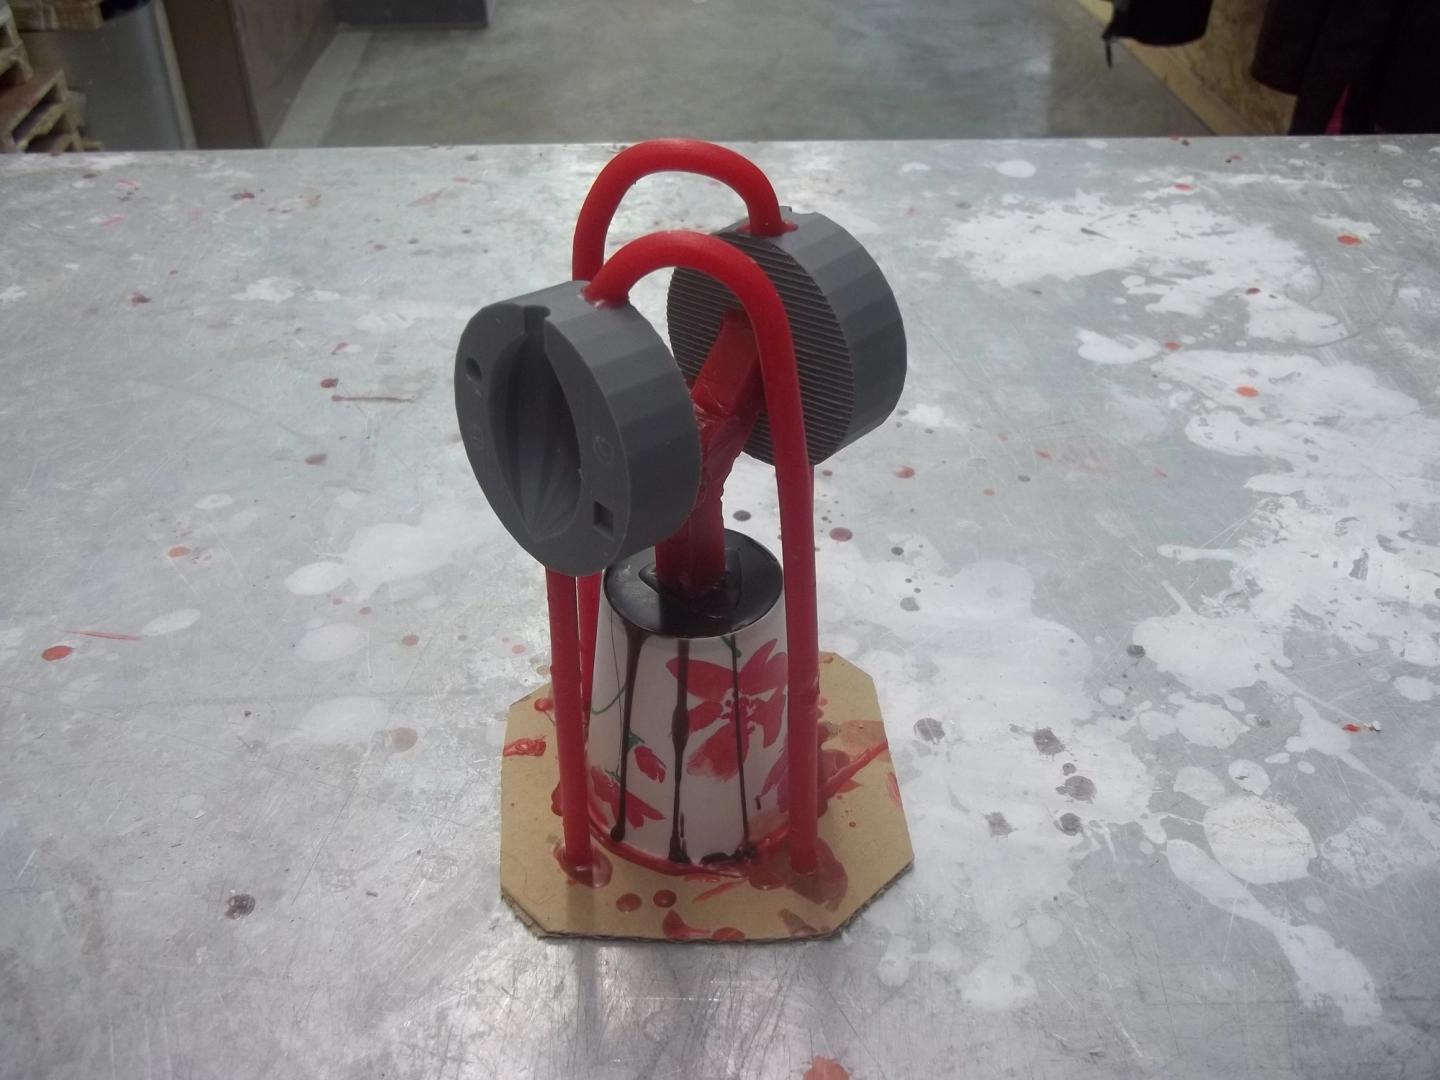
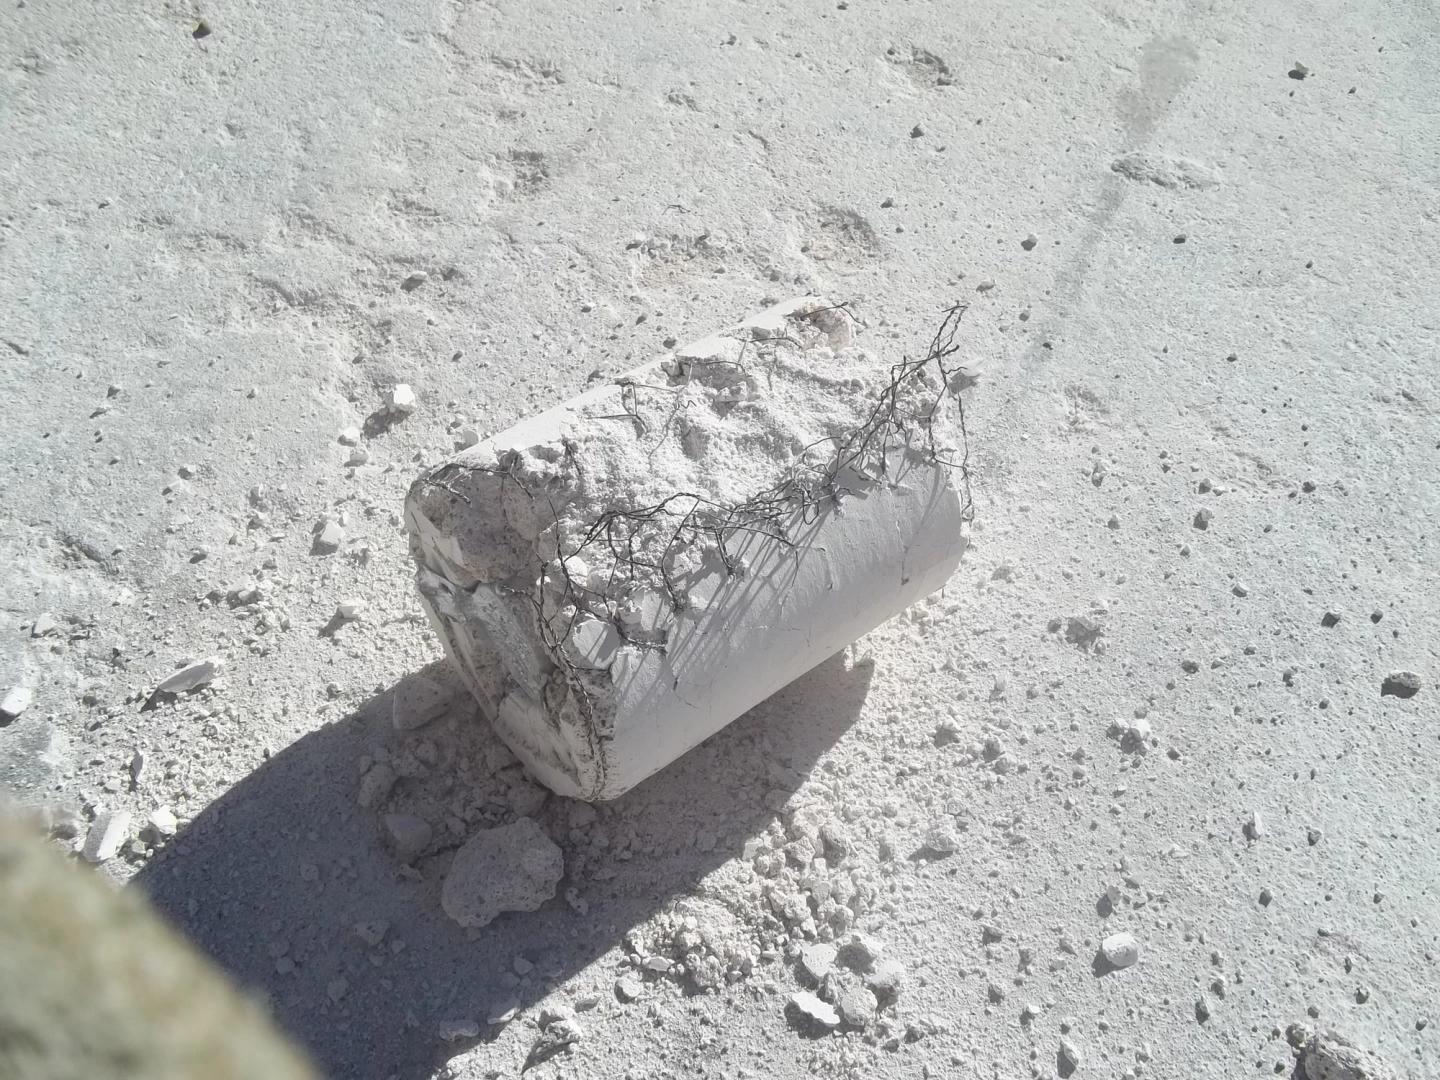
Next, a chicken wire (“poultry netting”) structure is built around the object to provide structural support to the mold when investing takes place. Finally an outer covering of tar paper is used to hold the plaster in place until it sets (plaster won’t seep through the stuff at all).
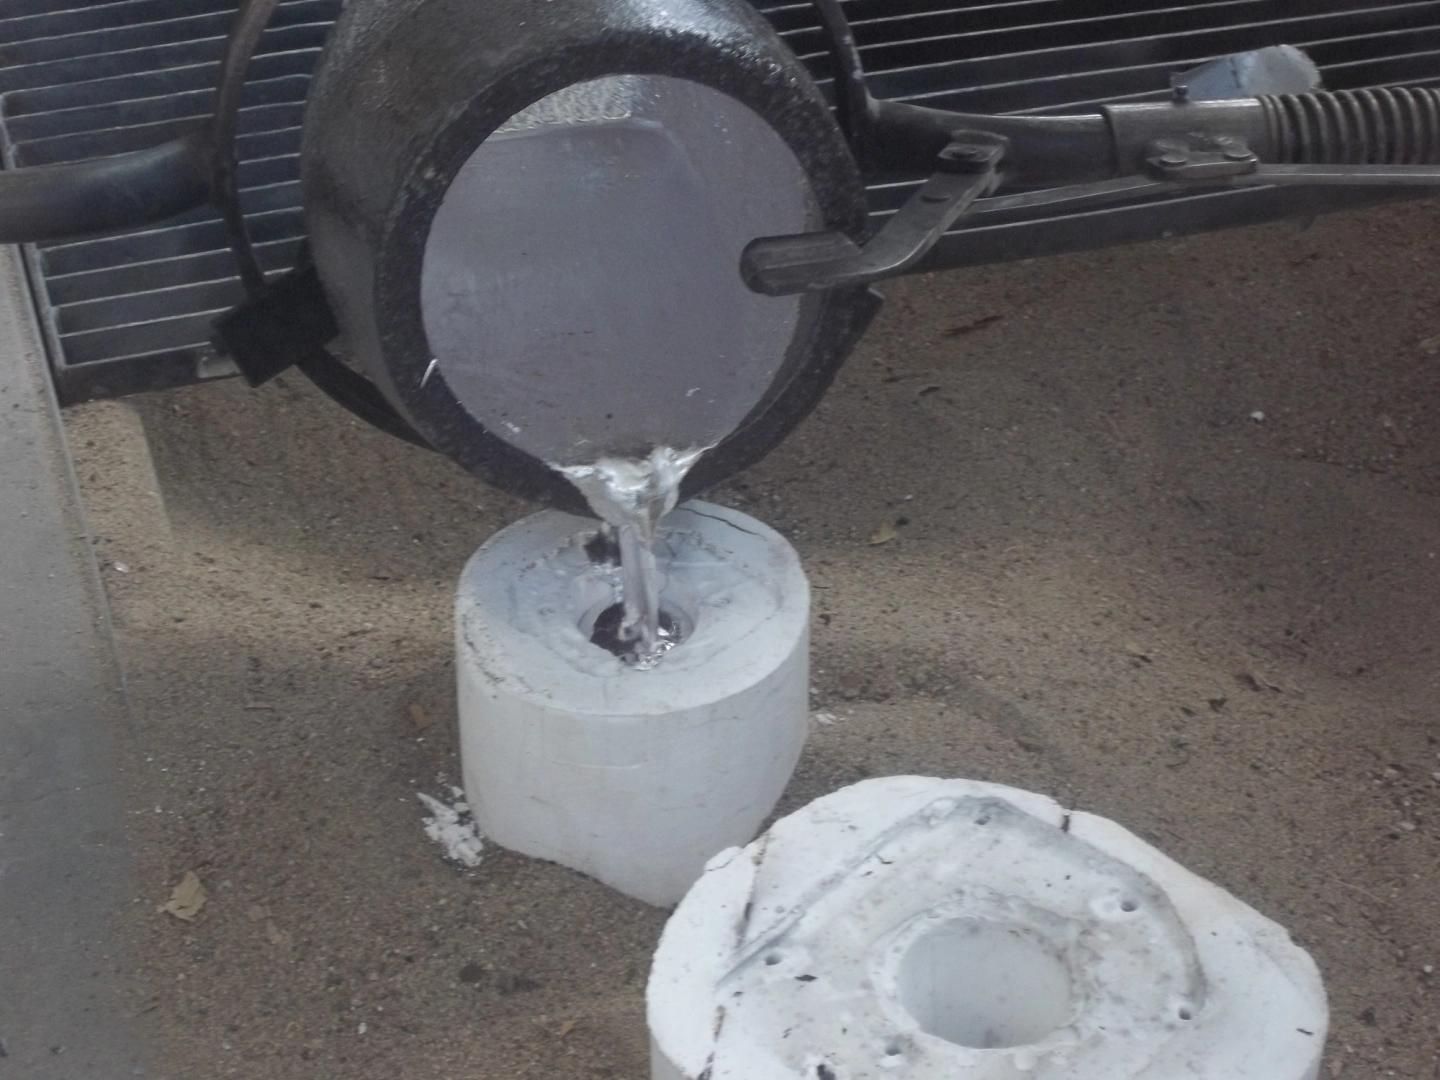
Investing – damming and pouring the molds
Once the pieces are gated and flasks have been built, the flasks can be filled with investment material to create the actual mold. I’ve been working with advanced sculpture students all semester, so to make things more efficient and help each other out, we all invest on the same day. We first put all the flasks on a long sheet of tar paper and poured investment material around the outside of the flasks to hold them down (called damming). Next we put all of the pieces into the flasks and began the intense process of mixing and pouring bucket after bucket of investment material until all of the flasks are filled.
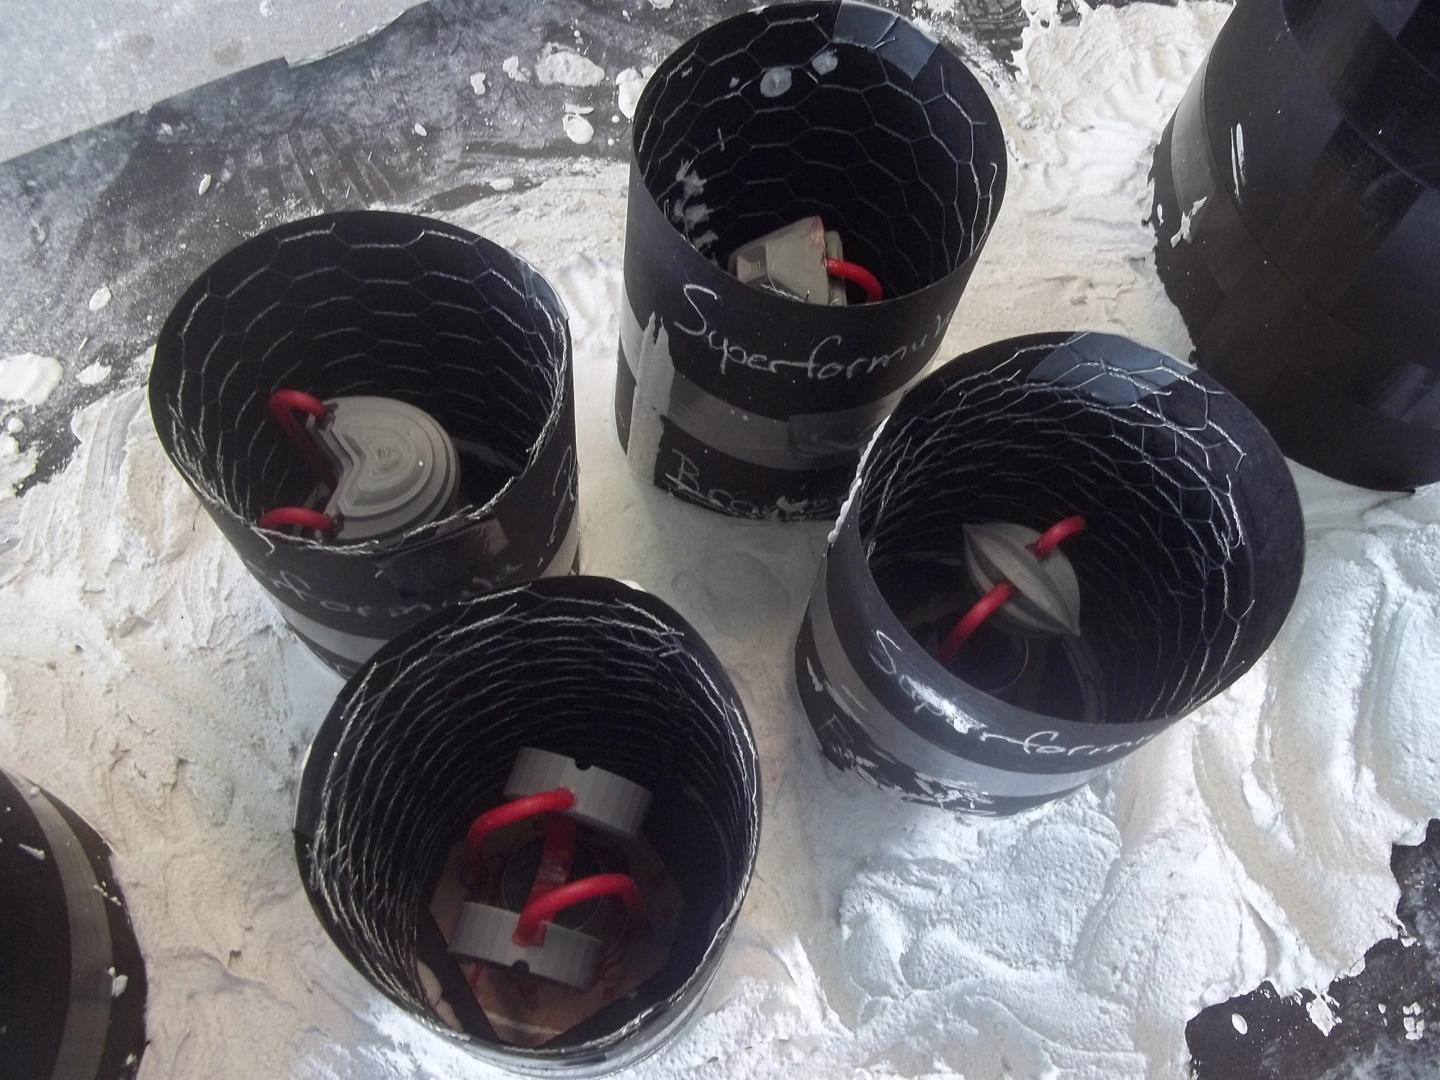
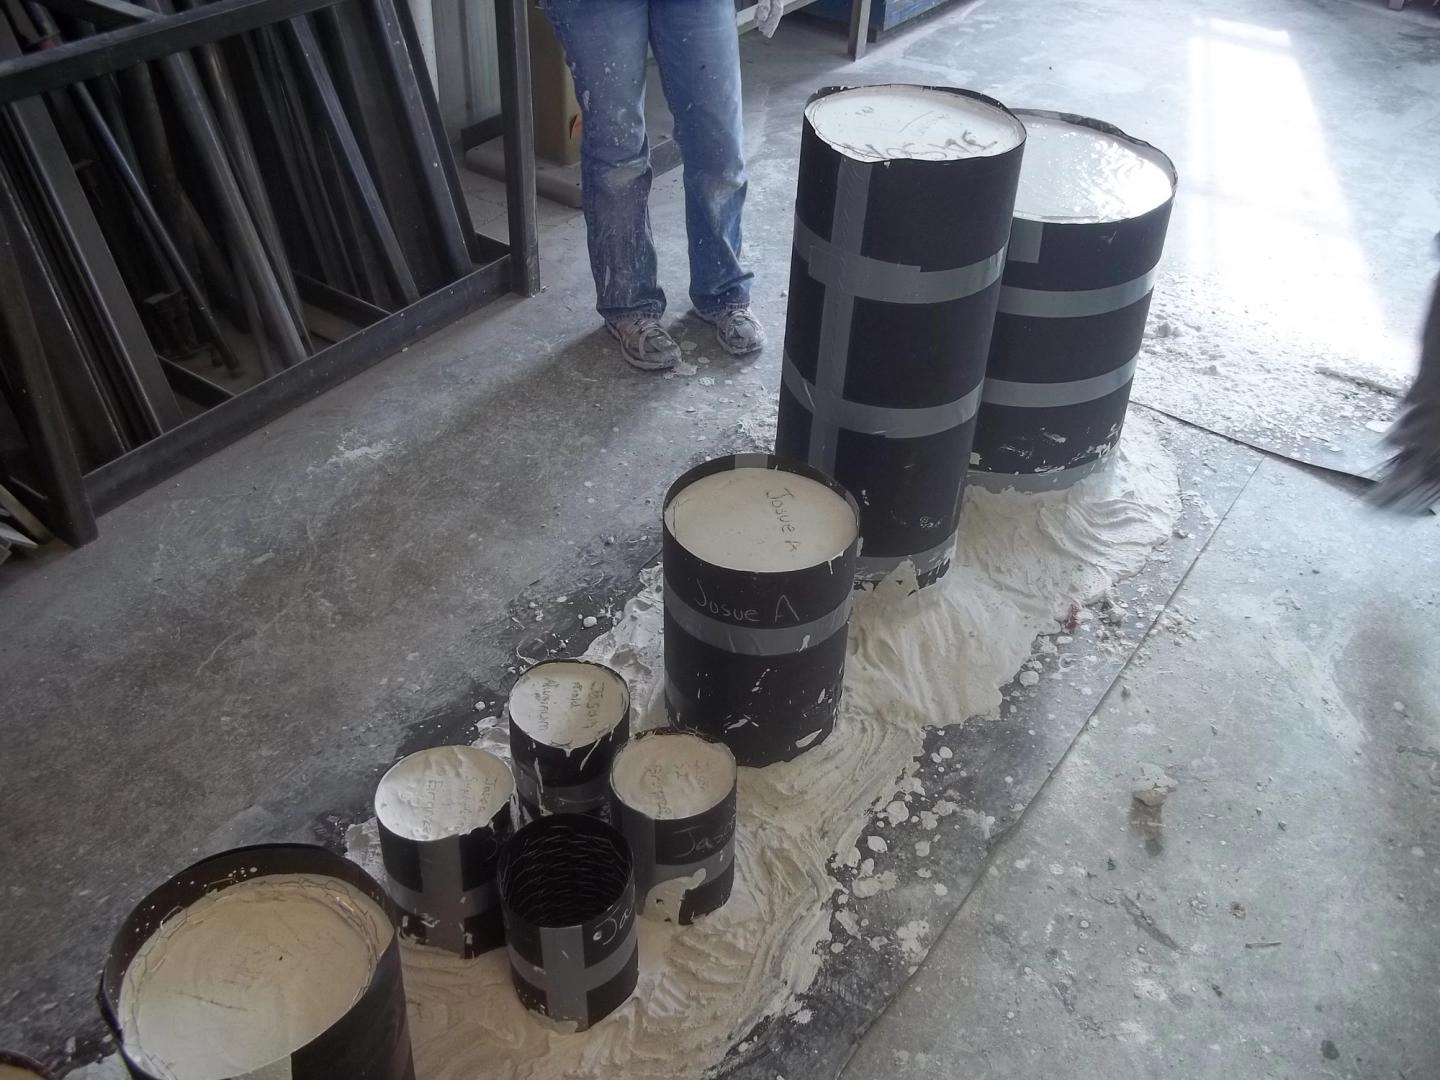
After investment, the tar paper is removed along with the cardboard covering up the gating systems, exposing the vents and the pour hole. The molds are stacked and placed into a kiln and the burnout process is started to get rid of all the wax / ABS.
Burnout – melting and burning the objects out of the molds
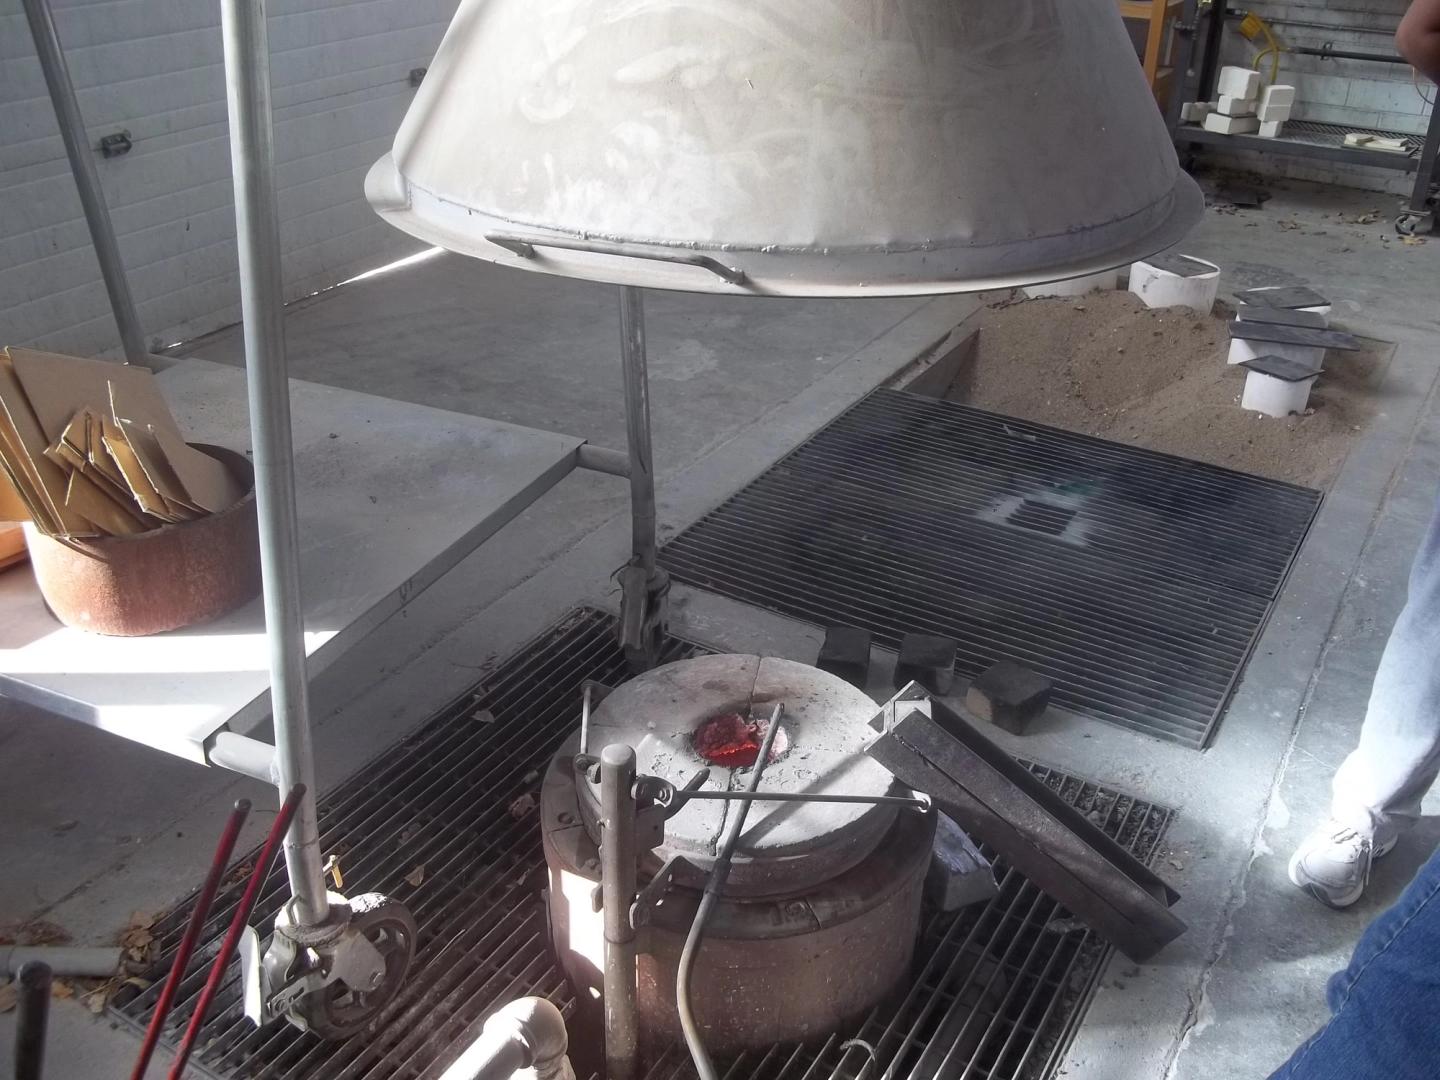
Because we had some pretty large molds, and we were planning to pour two different metals, the molds were separated into two batches (one for each metal). The molds intended for aluminum casting were put in the kiln first on Tuesday to prepare them for aluminum pouring on Thursday. The molds intended for bronze casting were put into the kiln on Thursday for a pour on Saturday.
The molds are placed into a kiln and heated up and cooled down over the course of 36 hours, causing the material inside of the molds to melt and/or burn away, leaving a cavity in the mold. The actual thermal cycle that the kiln goes through is digitally programmed so that it steps to different temperatures over time. For at least a couple of hours, the kiln will be at or around 600C, more than enough to burn the ABS plastic, or at the very least melt it out completely. At this point, we really don’t have a good way of knowing how well the ABS burned out, we just have to try to cast some metal and see what results!
I did notice that my smaller molds had some cracks in them, which will get filled with metal later and result in ‘fins’ that need to be broken off. Not a catastrophic problem, but it does compromise some of the finer details of the piece.

Casting
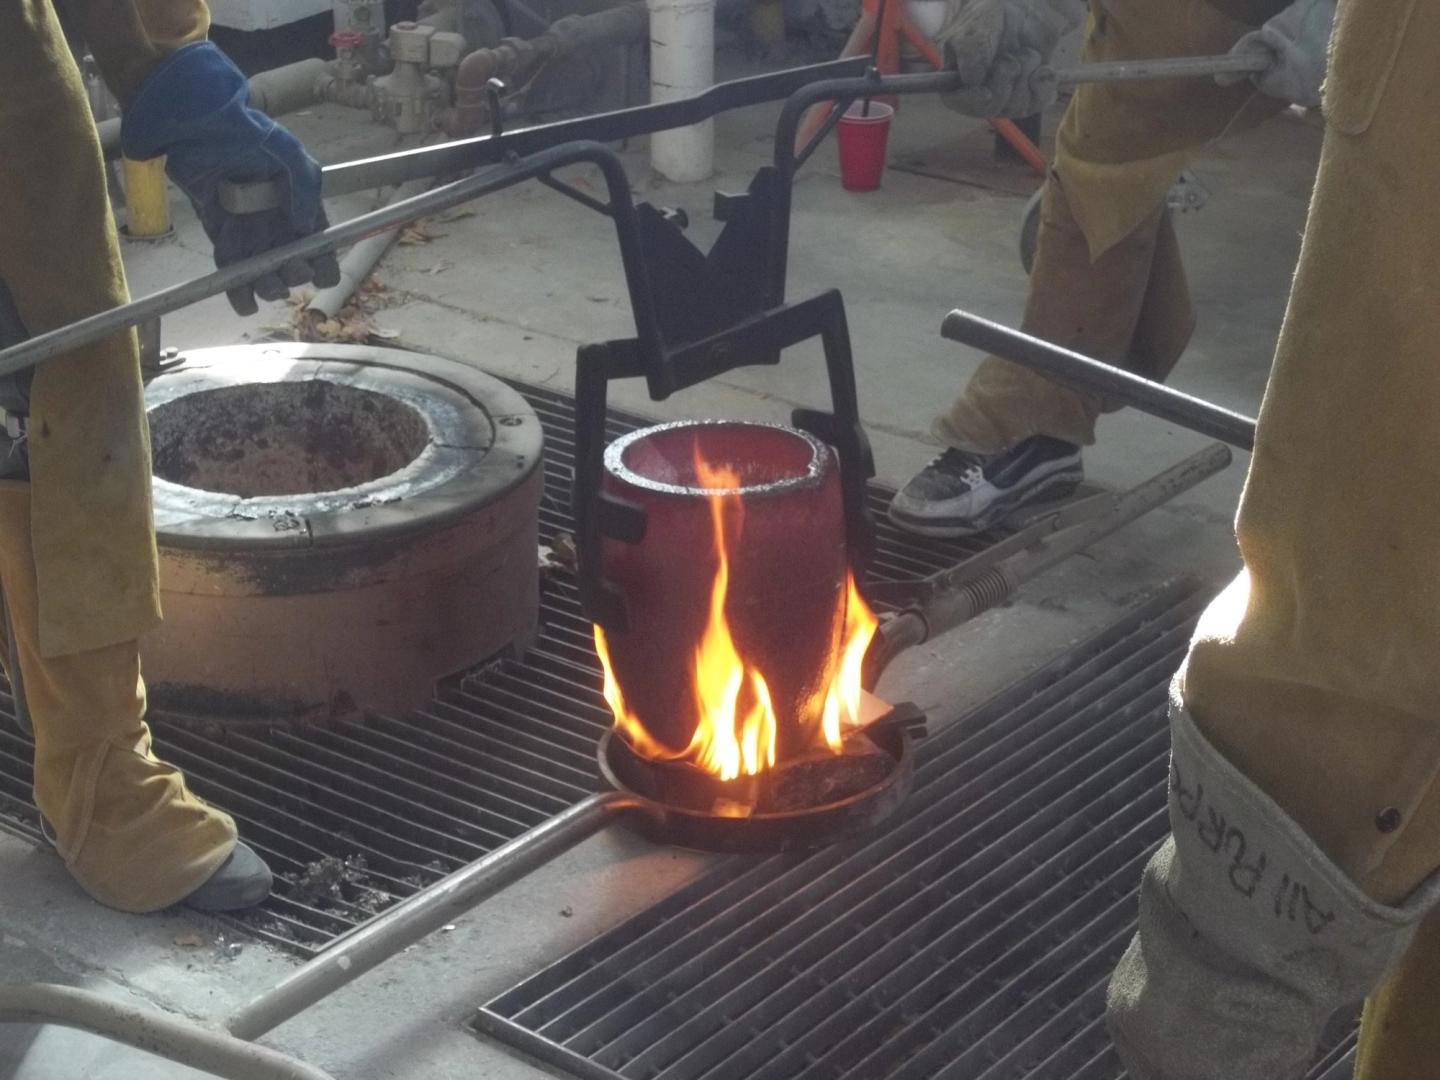
Thursday was the aluminum pour, which is always a really intense process. The molds cannot be allowed to cool too much after going through the thermal cycle in kiln, so once that cycle is done, the casting equipment must be ready to go. The crucible is fired up to approximately 1200F and aluminum ingots are melted.
The students work to transfer the molds from the kiln into a sand pit, then dam up the molds with the sand as much as they can. The instructor and an assistant work together to transfer the crucible full of molten aluminum to be near to the sand pit, then carefully pour the metal into each mold before returning the crucible to the firing pit. Metal is poured until it just comes through the vent holes, so that you know your object is full.
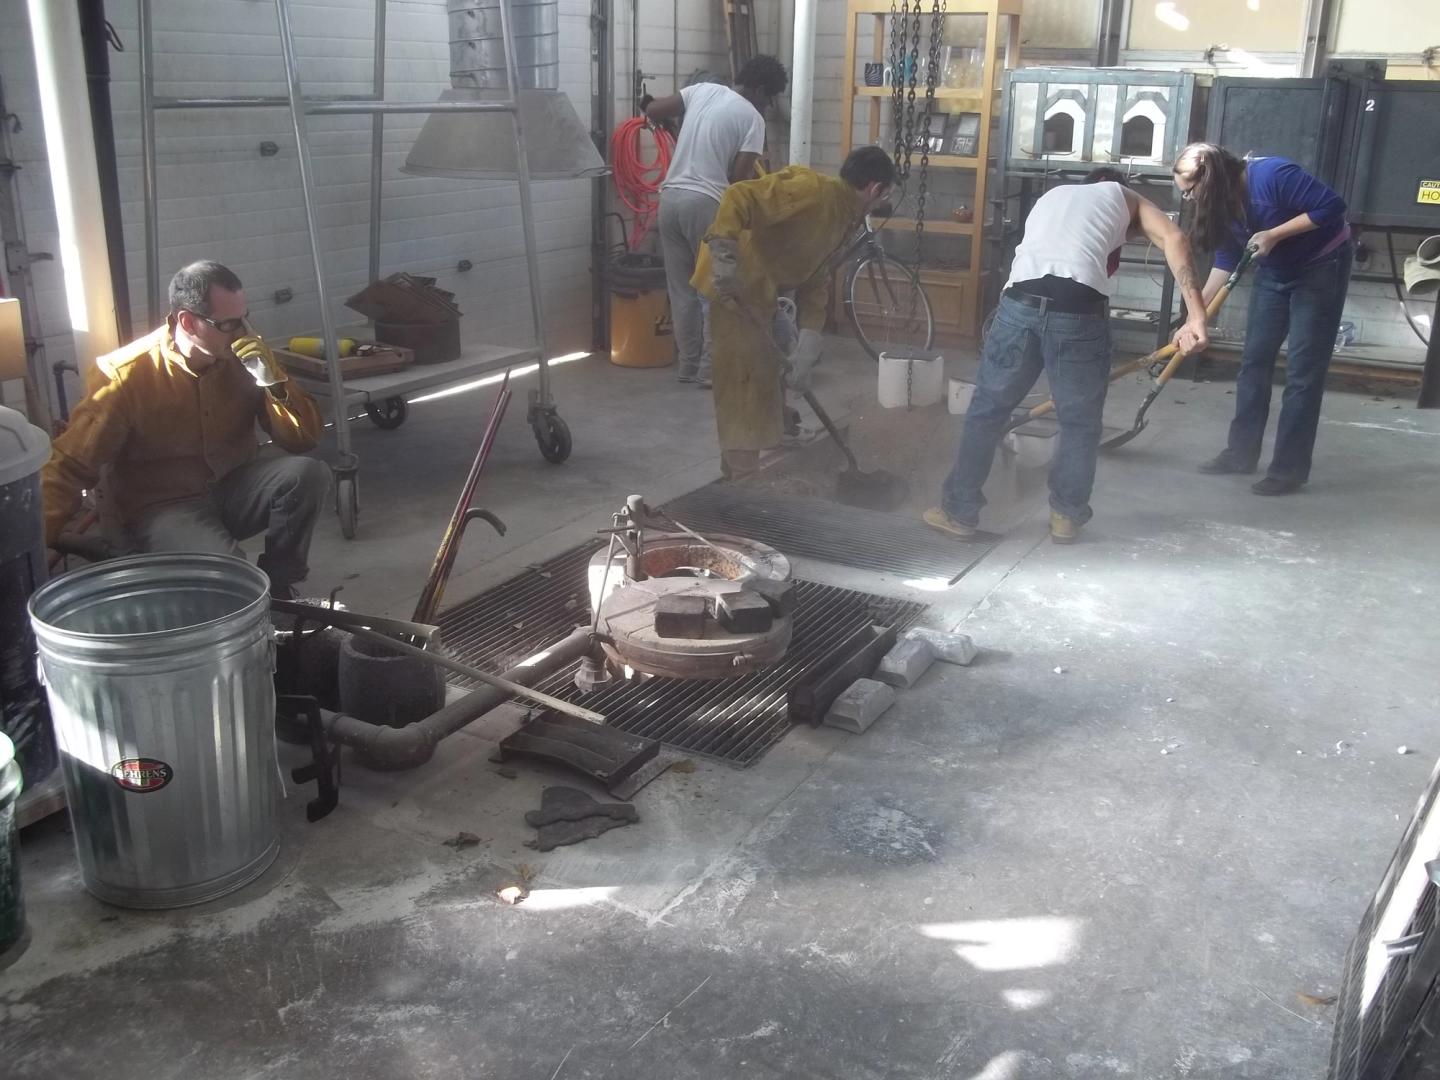
This step of the process is pretty fascinating to me in how little it has changed in however many thousands of years people have been doing it. We use better materials, we understand the physics at a finer level and we have a good idea of what it takes to make the pour successful. But at the end of the day, you’re using fire to melt metal and then pouring it into molds sunk into sand. The only real reminders I have of modern technology during this process are the long-neck digital thermometer used to read the temperature of the metal in the crucible, and the loud fan that is used to circulate an inferno of hot air around the crucible.
Demolding – retrieving the objects from the molds
Once the metal pour is done, the castings must be separated from the plaster mold. It’s a good idea to wait a couple hours for the molds and castings to cool down a bit, but it depends on how much protection you wear and the size of the molds. We use claw hammers and diagonal cutters to break apart the mold and cut through the chicken wire surrounding the objects.
Gentle tapping with a hammer will cause most of the larger bits of plaster to fall off of the model. Wire brushes then make short work of any remaining bits of plaster.
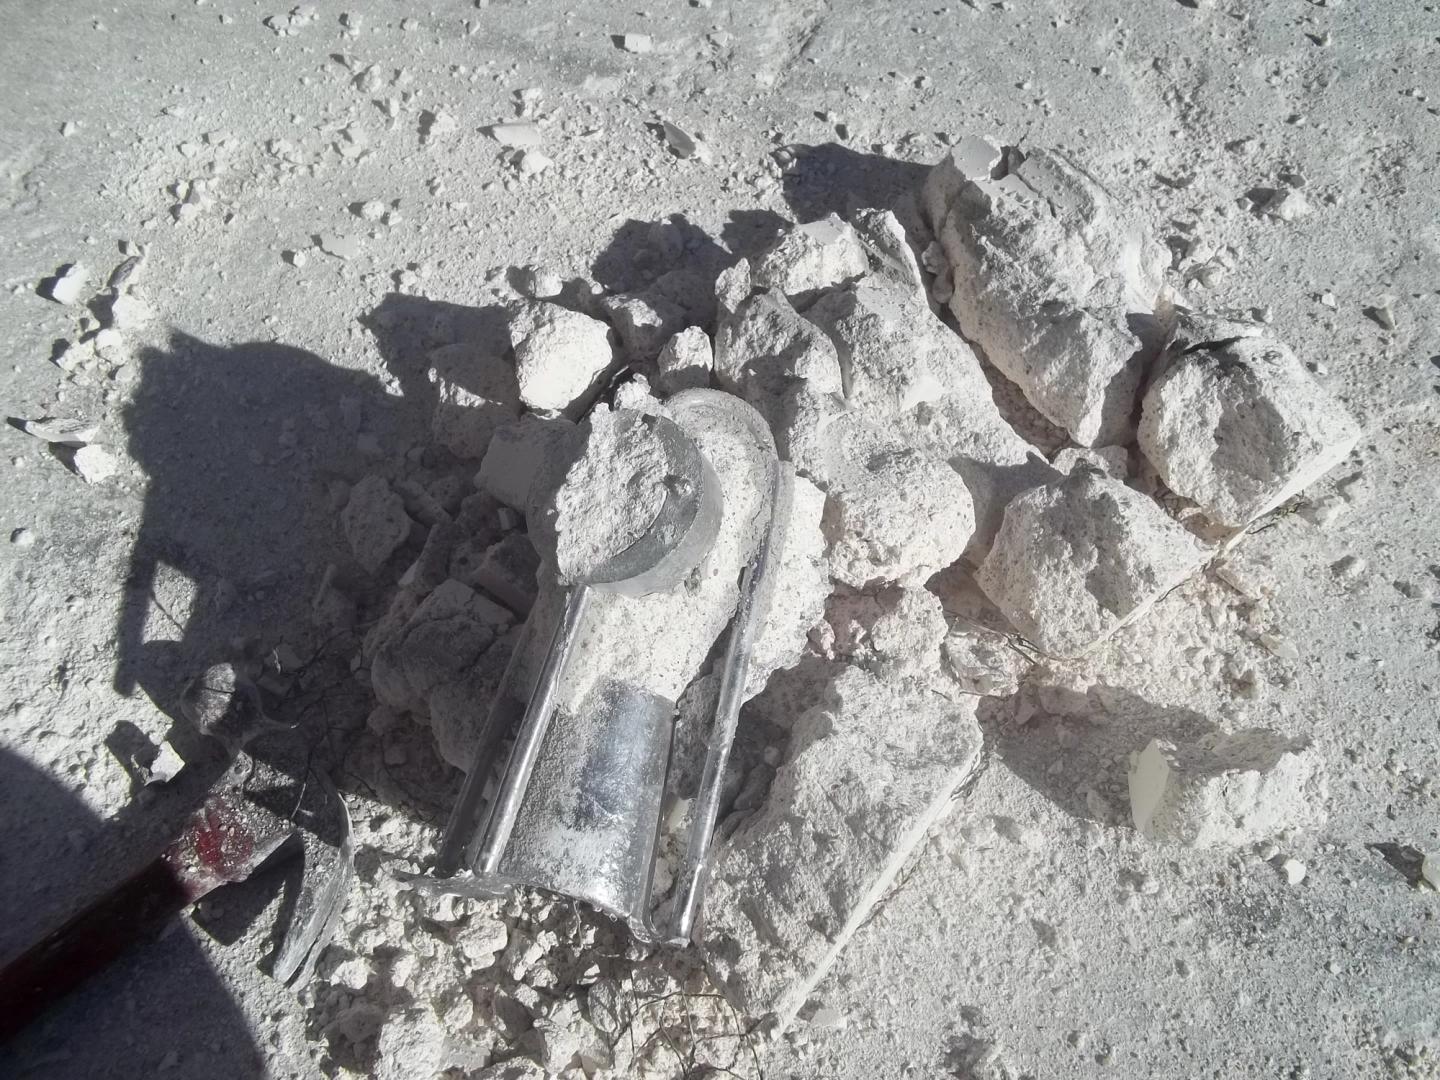
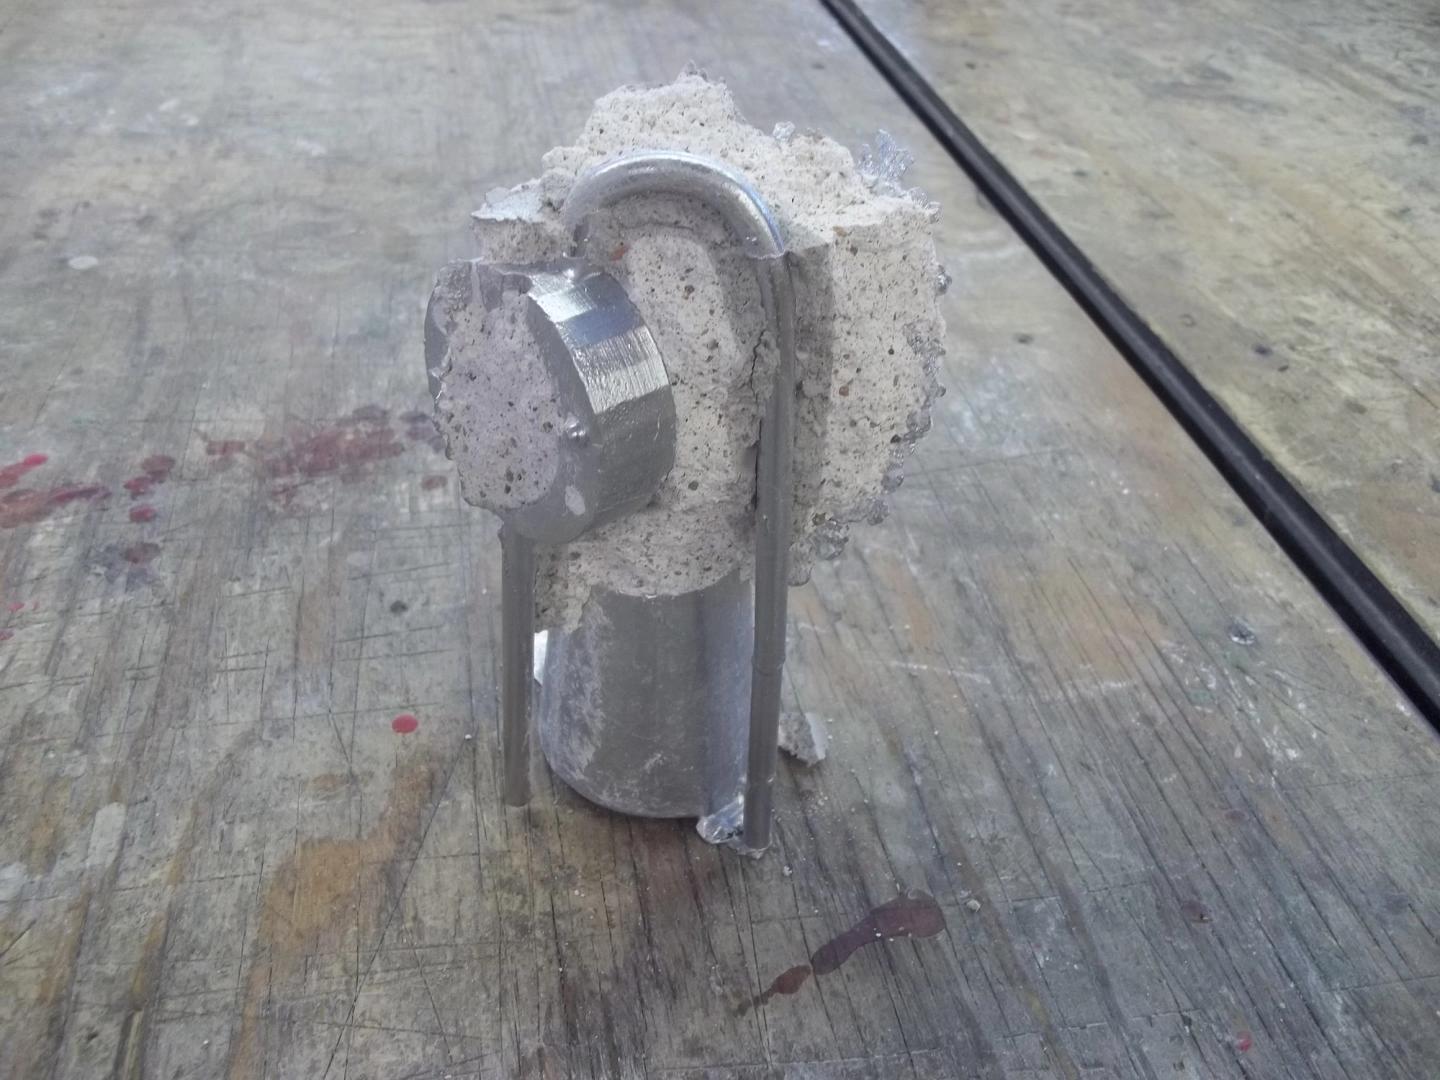
Cleaning – removing gates, fins, and other imperfections
With the plaster removed, I used a hammer and chisel to remove the ‘finning’ (the odd-looking thin slices surrounding the model). An angle grinder with a cutoff wheel is used to cut roughly cut off the gating system, followed by a thicker wheel and rotary tools to clean up the finer details and smooth things out.
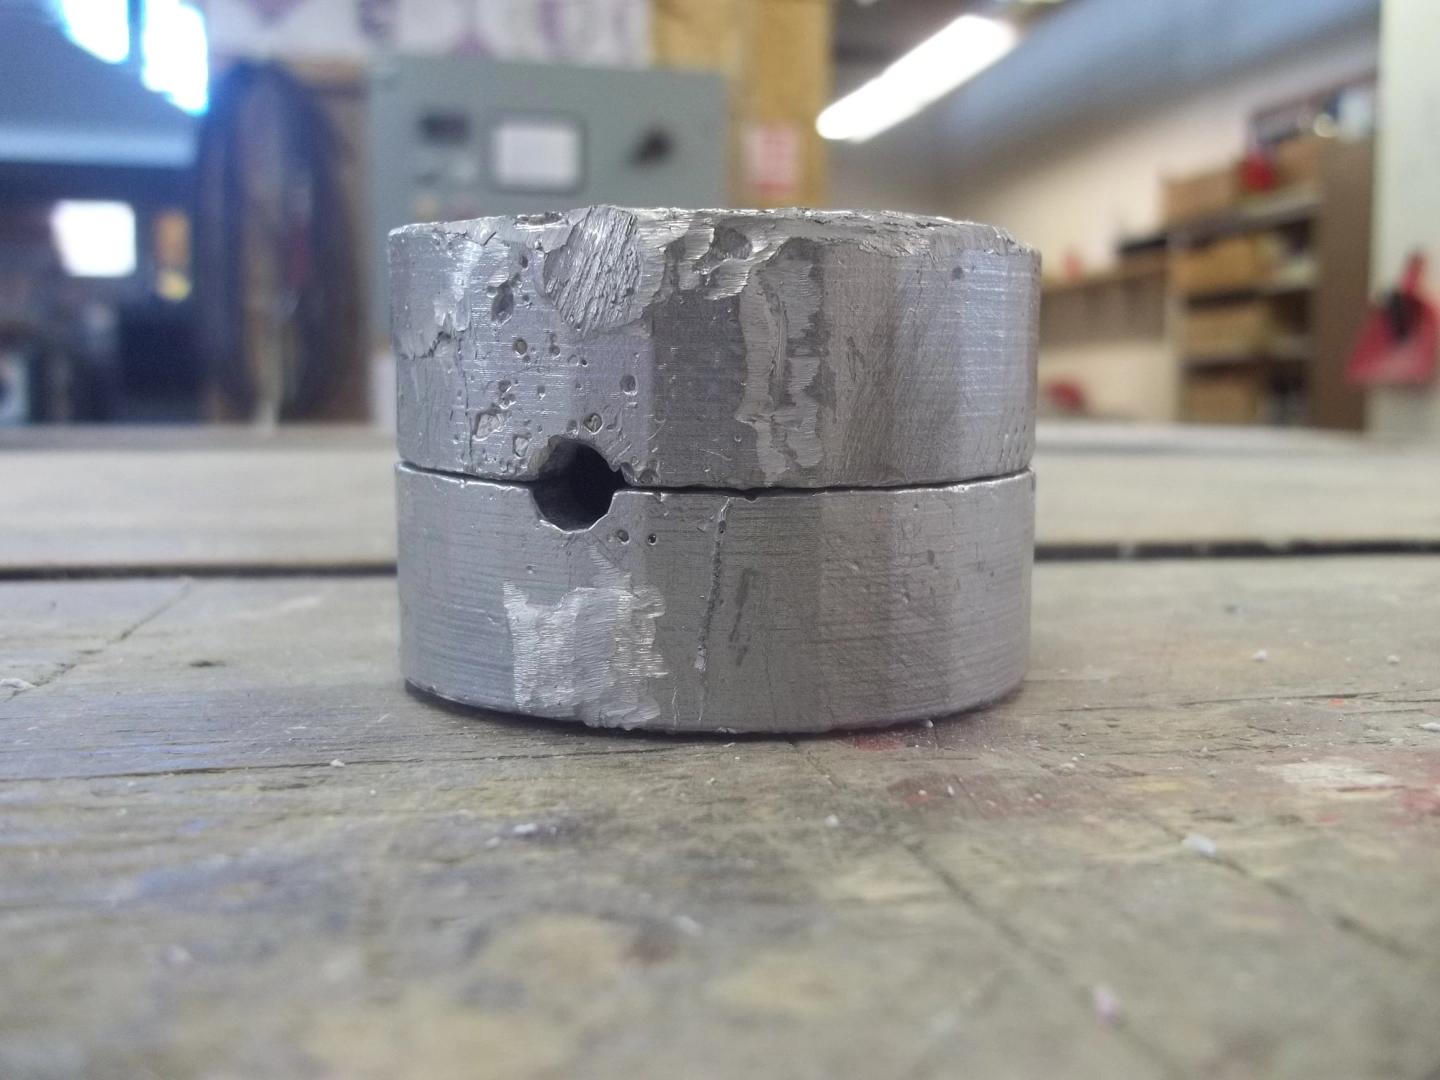
Finished pieces
Conclusion – so, does lost ABS work?
I’d say the results are pretty clear – this lost ABS experiment was a complete success! Now we can use our Makerbot Replicator 3D printer to print just about any 3D model in ABS or PLA plastic and create aluminum and bronze objects from them.
Implications
Traditionally, to use the lost wax / investment casting process, you have to either use wax forms from the get-go or spend potentially lots of time creating a series molds and wax copies of your objects. Some people like to experiment with other materials, but are often limited to organic materials like wood, plant-based products and even animal parts. But imagine if you could create a 3D model of any form you want, then print it in a consistent material that burns out well. When you consider some of the experimental work going on in the 3D printing world (like creating 3D models from photos with 123D Catch), the mold-making process could actually be cut out entirely! The labor, cost and materials savings this provides is well worth further experimentation.
Improvements and future work
One issue that I would like to fix is the amount of finning that is occurring. The theory right now is that the molds I’ve made so far were so small that they may have been ‘overcooked’ in the kiln. The kiln was programmed to melt and burnout wax from a pallet full of molds over the course of 36 hours. If the mold were put through the kiln for less time, it may come out better, but we’ll see.
I would also like to come up with a better way of gating up the pieces to prevent loss of the beautiful details from the 3D-printing process (horizontal lines of filament that look like tree rings). On other objects (not documented in this article), there were some shrink holes that may have been prevented with a different gating system.